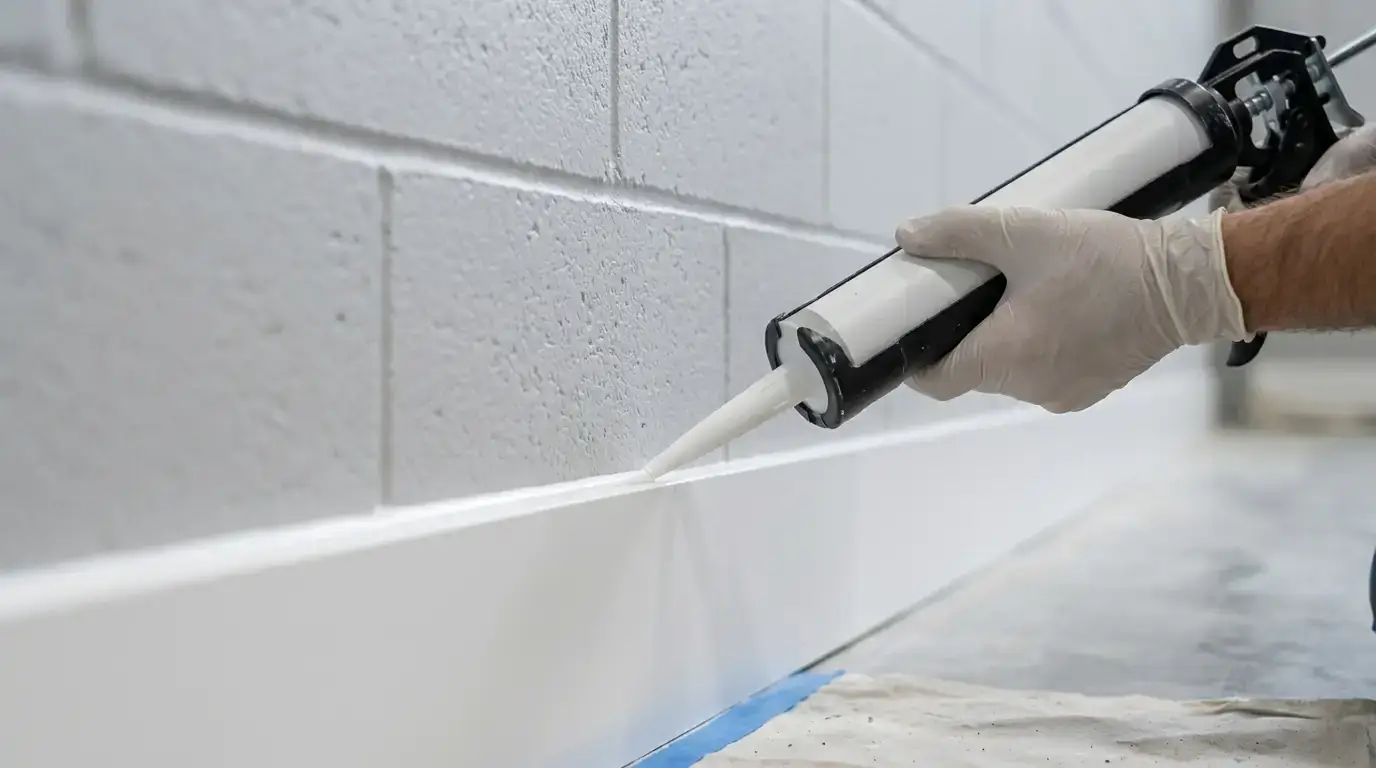
Caulk is very good at being caulk. It is considerably less talented at pretending to be wood filler, drywall compound, carpentry, or a structural repair. A useful caulking before painting guide therefore starts with the joint, not the tube.
Use a paintable sealant where two finished materials meet and a small flexible seam needs to move, such as trim against a wall. Repair rigid defects with the material meant for them. Large gaps, wet-area joints, and exterior weather seals deserve their own decision. Once you separate those jobs, the finish line usually looks cleaner and you spend far less time trying to sand something that was never designed to sand.
Where a Flexible Paintable Joint Actually Makes Sense
Paintable caulk is commonly useful along narrow joints where painted materials meet and a clean continuous line is wanted. Typical examples include:
For a related next step, read How to Prepare Walls for Painting in an Older Toronto Home.
- the top edge of baseboards where they meet painted drywall or plaster
- door casing against the wall
- window casing against the wall
- crown moulding where it meets the wall or ceiling
- paint-grade built-ins where trim meets a painted surface
- small paint-grade seams in moulding assemblies
- selected exterior trim, window, door, or siding joints when the chosen exterior sealant is designed for that location
DAP Canada’s current ALEX Painter’s Acrylic Latex Caulk page specifically lists windows, doors, baseboards, trim, and mouldings as painting applications. Its ALEX PLUS page also lists window and door frames, moulding, trim, baseboards, and corner joints among common uses.
Four Problems That Need Something Other Than a Bead of Caulk
A professional-looking paint job depends just as much on knowing where not to caulk.
Nail holes and dents
Nail holes in painted wood trim are generally better treated as surface defects rather than flexible joints. Use a filler appropriate for the trim and finish, sand it smooth when required, prime the repaired area if needed, and then paint. Caulk can shrink into a nail hole and leave a visible dimple.
Drywall cracks
A crack through drywall or plaster is not automatically a caulking joint. The repair should match the defect. Some cracks need tape and compound, plaster repair, or investigation of recurring movement rather than a bead of caulk over the surface.
Large open gaps
Do not assume that a thicker bead is the correct answer to a large gap. Product limits differ. For example, DAP currently says ALEX acrylic latex caulks should not exceed a joint about 1/2 inch wide by 1/2 inch deep and recommends backer rod when the depth exceeds that limit. Other elastomeric products may be rated for larger joints. The correct approach depends on the joint geometry and the exact sealant.
Areas that need 100% silicone
Some wet-area or weatherproofing joints may call for a 100% silicone product. DAP Canada states that its 100% silicone sealants are not paintable. If that type of sealant is required, the surrounding surface should generally be painted before the silicone is installed, following the specific product instructions.
Five Caulk Types, Five Different Purposes
Home centres group many different sealants together, but their paintability, flexibility, weather resistance, tooling time, joint capacity, and cure behaviour are not identical.
Painter’s acrylic latex caulk
This is a practical category for many interior paint-grade joints around baseboards, mouldings, doors, and window trim. DAP Canada’s current ALEX Painter’s Acrylic Latex Caulk is paintable with latex or oil-based paint after 2 hours according to its product page. It is water clean-up before cure and is marketed specifically for painting and trim work.
Acrylic latex caulk with silicone additive
Products in this category combine a paintable latex base with additives intended to improve flexibility and adhesion. DAP Canada’s current ALEX PLUS Acrylic Latex Caulk Plus Silicone is listed as paintable in 30 minutes. The important distinction is that this is not the same thing as a 100% silicone sealant.
Fast paint-ready acrylic latex caulk
Some products are designed around short painting schedules. DAP Canada’s current ALEX FAST DRY lists brush painting after 20 minutes and immediate spray painting. That timing belongs to that specific product and should not be copied onto other caulks.
Paintable elastomeric latex sealant
Where a joint needs more movement capability or exterior weather resistance, a paintable elastomeric sealant may be considered if it is approved for the substrate and exposure. DAP Canada’s current DYNAFLEX 230 is marketed for windows, doors, siding, and trim and is listed as paintable within 2 hours.
100% silicone sealant
Use this category where its waterproofing, flexibility, or specific application properties are needed, but do not assume it can be painted. DAP Canada explicitly states that its 100% silicone products are not paintable. Its FAQ also says that if non-paintable 100% silicone was used where paint is required, the silicone and residue must be removed before replacing it with a paintable sealant.
Current manufacturer details are available on the DAP Canada ALEX PLUS page and DAP Canada DYNAFLEX 230 page.
Primer and Caulk Order Depends on the Surface
There is not one universal sequence for every repaint, but the surface should be clean, sound, and compatible with the sealant before caulking. On new or repaired paint-grade work, priming porous or repaired surfaces before caulking can make defects easier to see and can provide a more uniform substrate for the remaining prep. On an ordinary repaint with sound previously painted surfaces, the sequence may be adjusted to the condition of the room and the products being used.
The hard rule is simpler: if the caulk line will be painted, use a paintable product and apply the finish paint only after the manufacturer’s stated paint-ready interval. Do not substitute a generic 24-hour rule or a generic 30-minute rule for the instructions on the actual tube.
The Tube’s Paint-Ready Time Beats a Rule From the Internet
Use the product-specific paint-ready time, not a universal cure time. Current DAP Canada examples show why:
- ALEX FAST DRY: currently listed as ready for brush painting in 20 minutes.
- ALEX PLUS: currently listed as paintable in 30 minutes.
- ALEX Painter’s Acrylic Latex Caulk: currently listed as paintable in 2 hours.
- DYNAFLEX 230: currently listed as paintable within 2 hours.
- 100% silicone products: currently listed by DAP Canada as non-paintable.
Temperature, humidity, joint depth, ventilation, and whether the product is clear can change drying behaviour. DAP’s current FAQ notes that many clear acrylic and latex caulks apply white and can take several days to turn fully clear, and it recommends waiting until a clear product has turned completely clear before painting it.
That is why the answer to should you caulk before painting is only half the decision. You also need to know exactly which caulk you used and when that product says it can accept paint.
A Clean Sequence for Paint-Grade Trim Joints
- Inspect the joint. Confirm that it is a small paint-grade seam rather than a structural crack, large construction gap, failed substrate, or wet-area joint requiring another system.
- Remove failed old caulk. Loose, brittle, cracked, or detached material should not be buried under a new bead.
- Clean the surfaces. Remove dust, grease, loose paint, and debris. Manufacturer guidance generally requires clean surfaces for proper adhesion.
- Repair rigid defects separately. Fill nail holes, dents, drywall damage, or damaged wood using the appropriate repair material.
- Prime where the project requires it. Bare or repaired surfaces may need primer before the final caulking and paint sequence.
- Select a paintable sealant. Check the label for substrate compatibility, interior or exterior use, paintability, joint size, and paint-ready time.
- Cut a small nozzle opening. A smaller controlled bead is easier to tool cleanly than an oversized bead.
- Apply a continuous bead. Fill the joint without piling excess material over the surrounding trim and wall.
- Tool the bead promptly. Smooth it within the product’s tooling window. DAP’s current pages commonly instruct users to tool before the sealant skins over.
- Remove masking tape before skinning if tape was used. Waiting until the sealant has formed a skin can tear the edge.
- Let the caulk reach its paint-ready time. Use the current instructions for the exact product.
- Paint the joint as part of the finish system. Inspect the line after the first coat and correct any missed prep before the final coat.
The Top of the Baseboard and the Bottom Are Different Joints
On paint-grade baseboards, the most common caulk line is the narrow seam where the top of the baseboard meets the wall. The purpose is to close a visible shadow line and create a continuous painted transition.
The bottom edge where baseboard meets flooring is different. Do not automatically caulk that joint just because the top edge is caulked. Flooring systems can move, expand, require service access, or use quarter round or shoe moulding to cover perimeter gaps. Treat the floor junction according to the flooring and trim system rather than as routine painting preparation.
At inside and outside corners, determine whether the problem is a tiny paint-grade seam or poor carpentry that should be corrected. Caulk can improve a small paintable joint. It should not be used to disguise a major misfit that needs a carpentry repair.
Inside a Window Is Trim Work; Outside May Be Weatherproofing
Interior casing-to-wall seams are often ordinary paint-grade caulking work. Exterior window and door joints are different because they can be part of the weather barrier. Product selection should consider movement, water exposure, temperature, UV exposure, substrate compatibility, and whether the joint will be painted.
Acrylic painter’s caulk that works well along an interior baseboard is not automatically the right exterior sealant. DAP’s current exterior-oriented DYNAFLEX 230 product, for example, is designed for window, door, siding, and trim joints and is paintable. Its 100% silicone window and door sealants are designed for weatherproofing but are not paintable.
What Causes Caulk Lines to Look Wrong After Painting
- Using 100% silicone where paint must stick. Check paintability before application.
- Using caulk as nail-hole filler. Use an appropriate filler for face defects that need to sand flat.
- Running a huge bead over a large gap. Large joints may need repair, backer rod, or another sealant system.
- Caulking over dust or loose material. Adhesion is only as good as the surface underneath.
- Painting by a generic timer. Paint-ready times differ by product.
- Leaving clear latex caulk milky and painting over it immediately. Follow the clear-product instructions.
- Caulking active cracks without diagnosing them. Recurring movement can reopen the seam.
- Caulking every baseboard-to-floor joint. The floor and trim system should determine whether that junction is sealed.
If the Bead Misbehaves, Fix the Cause Before Painting It
The bead cracked after drying
Check whether the joint is moving more than the product can tolerate, whether the gap was too large, whether the substrate was dirty, or whether the bead was too thin to bridge the joint properly. Remove failed material before simply adding another cosmetic layer.
The caulk shrank into the gap
A second application may be appropriate for some products after the first application has dried, but large or deep joints should be assessed for backer rod, joint design, or another repair rather than repeatedly filling the cavity with surface caulk.
Paint will not stick to the caulk
Confirm whether the existing material is 100% silicone or another non-paintable sealant. DAP Canada advises removing non-paintable silicone and its residue before replacing it with a paintable sealant.
The caulk line looks lumpy
The bead may have been oversized or tooled after skin formation began. Clean tooling while the product is workable is easier than trying to hide a rough ridge with paint later.
Caulking Before Painting Questions Answered
Should you caulk before painting trim?
Yes, for visible paint-grade trim joints. Apply caulk to the appropriate seams after priming where the project requires it, and before the final finish coats. Use a paintable product and follow its stated paint-ready interval before rolling or brushing over the bead.
Where should you caulk before painting?
Caulk narrow, paintable seams where trim meets walls or ceilings: baseboards, door casing, window casing, crown moulding, and similar paint-grade joints. Do not use caulk for nail holes in trim faces, drywall cracks, large construction gaps, or flooring junctions that need to flex or allow future access.
Can you paint over acrylic latex caulk?
Yes. Most acrylic latex caulks are designed to be painted, but the paint-ready window varies by product. Current DAP Canada products range from about 20 minutes to 2 hours depending on the exact formulation. Always use the number on the product label, not a generic internet estimate.
Can you paint over silicone caulk?
Not if it is 100% silicone. DAP Canada explicitly states that its 100% silicone sealants are not paintable. If you need paint to stick, choose a product specifically labelled paintable, such as an acrylic latex or siliconized acrylic latex, or complete the painting before the silicone goes in. Using the wrong sealant and then trying to paint over it is one of the most common finish-paint problems in trim work.
Should nail holes in baseboards be filled with caulk?
No. Use a sandable filler instead. Nail holes in trim faces are rigid defects that need to be levelled flush, primed, and painted. Flexible caulk tends to shrink into the hole after drying, leaving a visible dimple under paint. Save caulk for the flexible seam along the top of the baseboard where it meets the wall.
Do I need to wait 24 hours before painting caulk?
No. A 24-hour wait is not a universal rule. Follow the exact paint-ready time stated on your product. Current DAP Canada examples range from 20 minutes to 2 hours for paintable acrylic caulks. Starting too early can leave visible brush marks or cause the bead to wrinkle. Waiting longer than necessary simply delays the project. The label is the reliable answer.
Use Caulk Where Movement Exists, Not Wherever a Gap Exists
The useful rule from this caulking before painting guide is to match the material to the problem. Use paintable caulk for appropriate trim and movement joints, use fillers or repair compounds for rigid defects, and reserve non-paintable silicone for locations where its specific properties are needed and the paint sequence allows it.
For broader wall and trim preparation, see interior painting in Toronto.
If the prep list includes failed caulk, damaged trim, wall repairs, and repainting in the same rooms, it can make sense to review the work as one scope instead of solving each seam separately. A quote request through PaintersInToronto.ca goes to one licensed and insured independent painting company, with any service agreement made directly with that contractor. You can also call (647) 532-9046 and Ask for SUNNY.


